Delicacies fill life but diabetes seems like giving up your favorite taste. Traditional desserts are high in sugar concentration which can increase the blood glucose level and deteriorate diabetic health.
But today you got the good news! because diabetic-friendly desserts let you enjoy the sweet taste without worrying about your health.
In this article, we will dwell on dessert recipes with sugar alternatives, examine the recipes suitable for diabetics, and assist you in selecting the ideal sweet taste. So with a little creativity and this guide, you can enjoy the sweet taste.
Breakfast Ideas for Gestational Diabetes: 25 Delicious Choices!
2. Healthy Sweetness Without Artificial Sweeteners

It appears that artificial sweeteners are the typical choice for diabetic treats but recent studies, however, show that it is not the case.
According to Mayo Clinic, diabetics can take artificial sweeteners in moderation but there must be care taken because different people may respond differently when it comes to insulin due to blood sugar regulation.
So here the question comes again, how can we manage our diabetes while treating the sweet treats? The answer is dessert without artificial sweeteners and we can achieve this by focusing on natural ingredients and creative substitutes.
This strategy helps you to get the desired results. Let’s investigate this further to get the lovely balance.
3. 15 Diabetic Dessert Recipes Without Artificial Sweeteners:
This section will explain the 15 best diabetic dessert recipes without artificial sweeteners from credible sources.
3.1 Summer Berry Crush
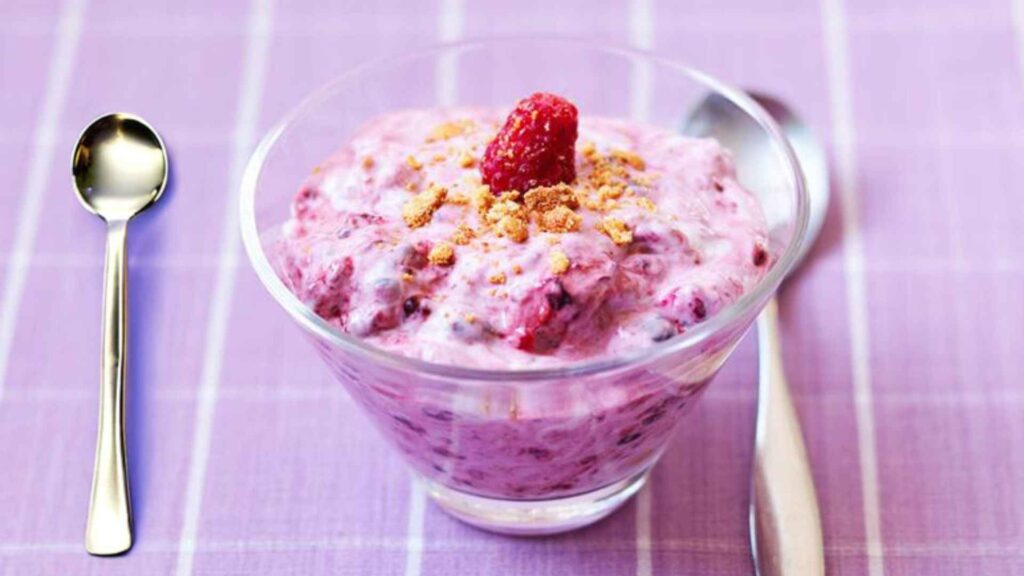
Summer Berry Crush is the first and most lovely dessert on the list to refresh your dinner parties or family gatherings.
Berries (blueberries, strawberries, etc.) are relatively low-glycemic index, rich in fiber and antioxidants, which makes them generally safer for blood sugar control compared to many high-sugar fruits.
Berry polyphenols (especially anthocyanins) may improve insulin sensitivity and reduce post-meal glucose spikes.
Serves: 2
Preparation Time: 10 minutes
Nutritional Information (per 212g serving, excludes serving suggestion):
Calories: 137
Carbohydrates: 16.0 g
Fiber: 3.1 g
Protein: 10.1 g
Fat: 3.0 g
Saturates: 0.5 g
Sugars: 9.9 g
Salt: 0.1 g
Fruit/Veg Portion: 1
Ingredients:
- 200g of frozen mixed summer berries (defrosted)
- 200g frozen mixed summer berries, defrosted
- 200g carton virtually fat-free fromage frais
- Sugar-free sweetener, to taste
- 25g amaretti biscuits, lightly crushed
Method:
Gently mix all the ingredients in a bowl until all mix completely.
Spoon the mixture and serve the serving glass or bowl.
Additional Tips:
If you don’t have amaretti biscuits you can substitute it with shortbread or ginger biscuit.
If you like a vegan-friendly version, replace the fromage frais with a soy-based yogurt.
3.2 Rustic Cocoa Cinnamon Meringues
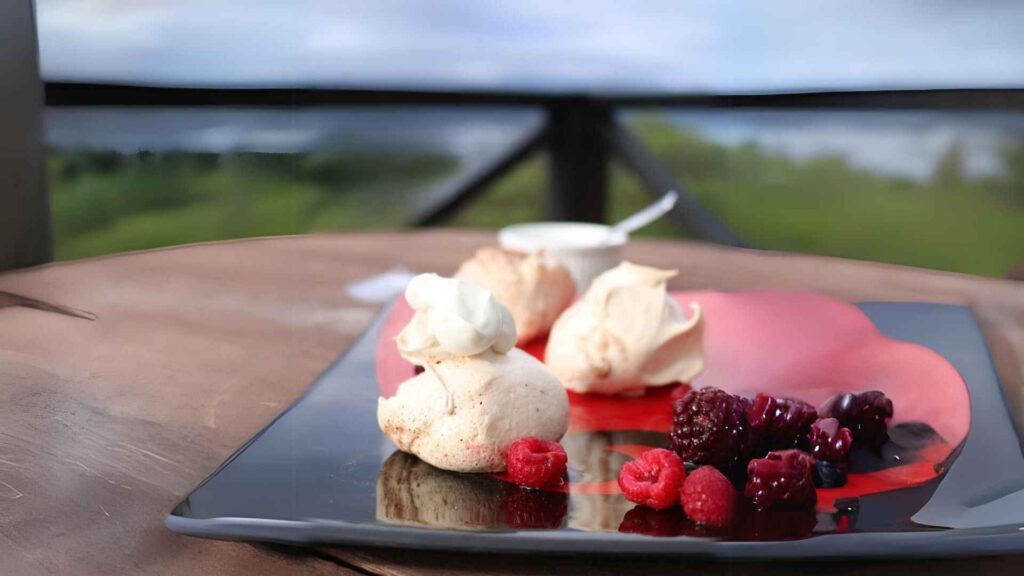
Rustic Cocoa Cinnamon Meringues with the flavor of cocoa and cinnamon is a delightful, slightly spicy, light, and fluffy meringue for a delightful moment.
Rustic Cocoa Cinnamon Meringues fit into this approach because they are:
- Very low in fat (0.1 g per serving)
- Made with egg whites, which add volume without extra calories
- A dessert that can be portioned easily to manage carbohydrate intake
- Free from heavy creams, butter, or high-fat dairy
However, they still contain sugar, so they must be eaten mindfully, as part of a balanced meal plan guided by a healthcare professional or diabetes educator.
Important Note
These meringues are not sugar-free and are not suitable for all diabetic diets, especially for individuals on strict carbohydrate limits.
People with diabetes should always account for these 20g carbohydrates per serving in their daily totals.
Prep time: 10-15 Minutes
Cooking time: 1 hour
Nutritional information per 33g serving:
Energy 373 kJ (89 kcal)
Protein 1.6 g
Total fat 0.1g (Sat Fat 0.1g)
Carbohydrate 20.1g (Sugars 19.8 g)
Sodium 25mg
Ingredients:
- 95 g caster sugar
- 2 egg whites
- 3/4 tsp vinegar
- 3/4 tsp artificial vanilla essence
- 3/4 tsp cornflour
- 35g brown sugar
- 1/2 tsp ground cinnamon
- 2 tsp cocoa powder
Instructions:
- Beat and mix the sugar and egg whites until they become smooth and thick.
- Stir them in cornflour, vanilla, and vinegar.
- Add dissolved brown sugar and then mix them in chocolate and cinnamon.
- On the baking tray press meringues into shapes and then bake.
Tip: Pair it with berries and Greek yogurt for a well-balanced dessert.
3.3 Yoghurt Berry Bark
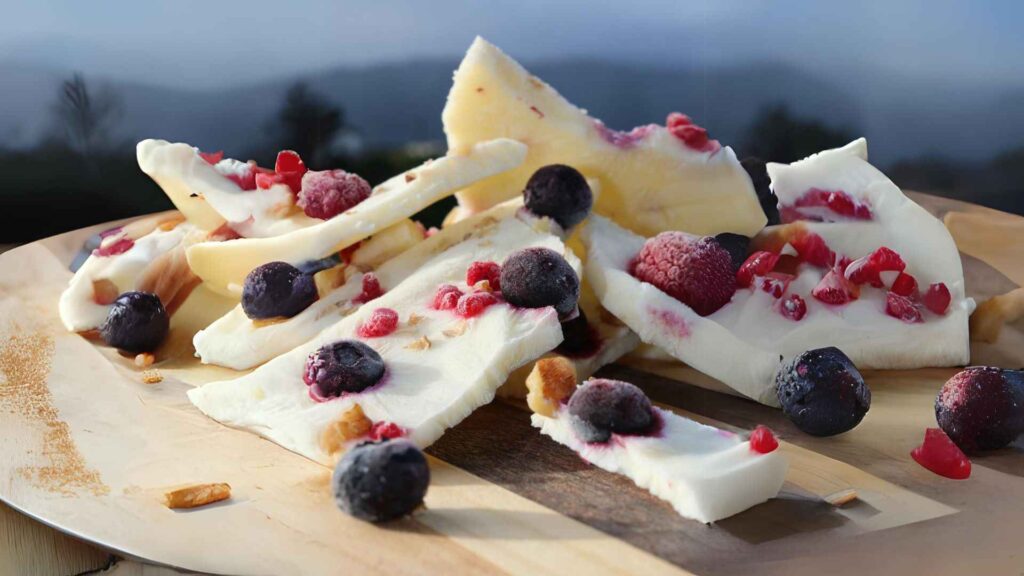
Yoghurt Berry Bark with Greek yogurt is a customizable and refreshing frozen recipe that is topped with nuts and fresh berries.
Serves: 4
Prep time: 5 mins
Freezing time: 2 hours minimum
Nutritional information per 150g serving:
Energy 430 kJ (103 kcal)
Protein 9.0 g
Total Fat 2.1 g (Saturated Fat 0.4 g)
Carbohydrate 9.6 g (Sugars 9.5 g)
Sodium 107 mg
Ingredients:
- 2 cups plain Greek yogurt (no more than 2% fat)
- 1 tsp vanilla-flavored essence
- 1/4 tsp sugar substitute
- 35g raspberries
- 35g blueberries
- 1 Tbsp walnut pieces
Directions:
- Blend yogurt, vanilla extract, and sweetener mixture.
- Using a sprayed tray transfer the mixture onto it and top it with berries and nuts.
- Before presenting, freeze it for about 2 hours until it becomes solid and firm, and then slice it into shards.
Tip: you can try a variety of seasonal fruits to create a unique flavor combination.
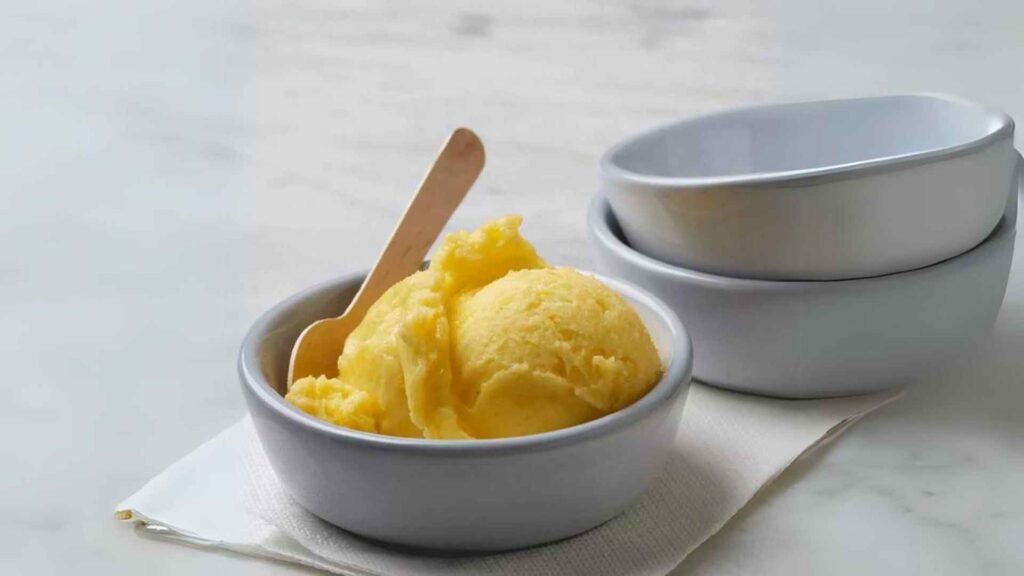
3.4 Kawakawa, Banana, and Ginger Sorbet
This dessert is a special sorbet that combines bananas, ginger, and kawakawa tea to make a cool and satisfying treat. Remember, moderation is the most important factor for diabetics.
Serves: 4
Prep time: 1 hour (including 30 minutes freezing)
Nutritional Information per serving (approx 122 grams):
Energy 507 kJ (121 kcal)
Protein 2.1 g
Total Fat 2.9 g (Sat Fat 1.8 g)
Carbohydrate 20.2 g (Sugars 16.8 g)
Sodium 33 mg
Ingredients:
- 2 large ripe bananas
- 1/2 tsp ginger
- 1/2 tsp honey
- 1/2 cup kawakawa tea
- 1/2 cup natural unsweetened yogurt
Directions:
First, freeze the bananas, then blend them with ginger, honey, and kawakawa tea.
After blending, mix the yogurt and blend again until it becomes smooth.
Refrigerate again and serve it when it becomes creamy and firm.
Tip: For the best feel and texture eat it within 5 hours.
3.5 Strawberry-Chocolate Greek Yogurt Bark
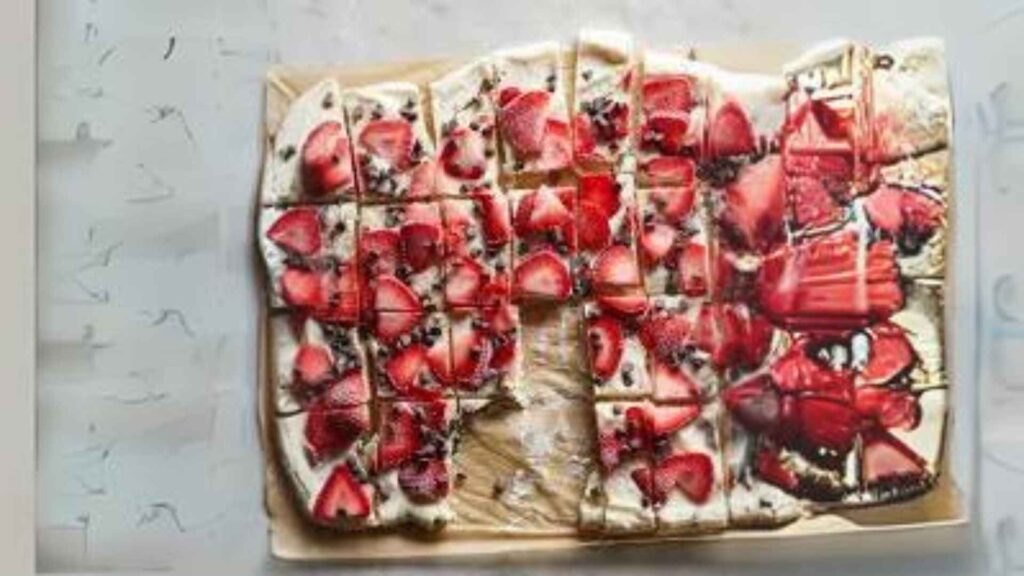
Strawberry-Chocolate Greek Yogurt Bark is a healthier substitute for conventional chocolate bark which is a mixture of chocolate chips and fresh strawberries that will satisfy your sweet craving.
Why This Recipe Works Well for People with Diabetes
This recipe uses Greek yogurt (whole milk) paired with strawberries, mini chocolate chips, and a light natural sweetener. Together, they create a structure that helps moderate glucose release:
1. Greek Yogurt = Protein + Healthy Fats + Lower Glycemic Impact
Greek yogurt contains higher protein compared to regular yogurt. Protein slows gastric emptying and reduces post-meal glucose spikes. Whole-milk yogurt also includes fats that promote satiety and further stabilize blood sugar release.
2. Strawberries = Low-GI Fruit With Antioxidants
Strawberries have a low glycemic index and contain polyphenols that may support glucose metabolism.
3. Controlled Use of Dark/Bittersweet Chocolate Chips
Mini chocolate chips add flavor with limited portion size. Cocoa flavonoids may support insulin sensitivity when consumed in moderation.
4. Naturally Sweetened—No Refined Sugar
Honey or pure maple syrup is used in small amounts. It must be in controlled quantities to help maintain a predictable carbohydrate load.
Overall, this dessert remains much lighter in carbohydrates, higher in protein, and more blood-sugar-friendly than traditional chocolate bark.
Ingredients:
- 3 cups whole-milk plain Greek yogurt
- ¼ cup pure maple syrup or honey
- 1 teaspoon vanilla extract
- 1 ½ cups sliced strawberries
- ¼ cup mini chocolate chips
Directions:
Take a large baking sheet with a rim and cover it with parchment paper.
Then, in a medium-sized bowl, thoroughly mix and still vanilla, yogurt, and honey or maple syrup.
Again use the prepared baking sheet and spread the yogurt mixture into 10-by-15-inch rectangle slices.
Add chocolate chips and top it with cut strawberries.
Freeze it for at least 3 hours until becomes firm and solid.
For serving cut it into 32 slices or pieces.
3.6 Apple-Oatmeal Cookies
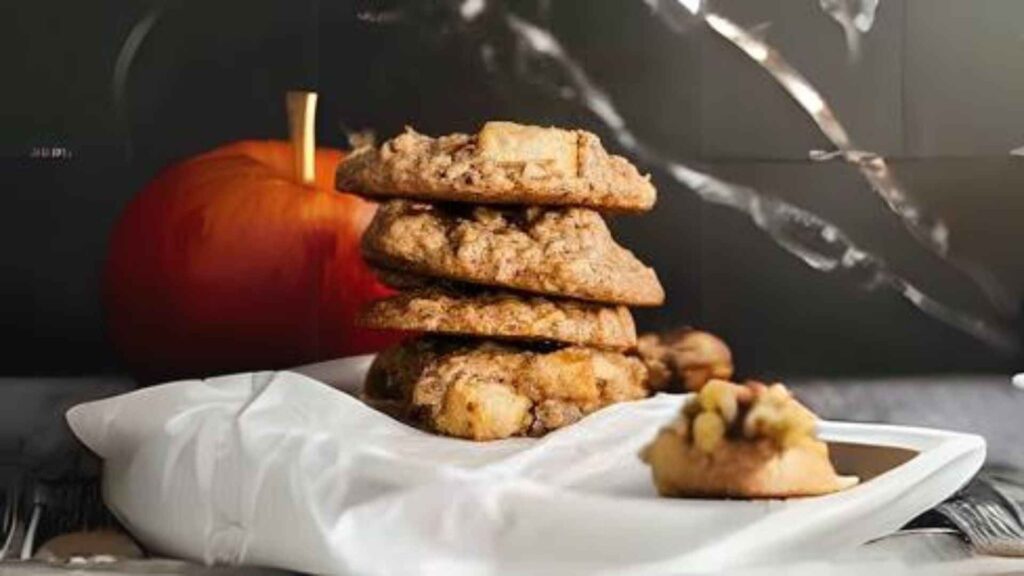
Apple-Oatmeal Cookies, is built on ingredients that offer better blood-sugar stability than conventional cookies. The key? Whole-grain oats, nuts, real fruit, and whole-wheat flour—a more balanced carbohydrate profile supported by nutrition research.
Why this recipe can work (with care) for people monitoring blood sugar
1. Oats Support Slower Glucose Absorption
Old-fashioned oats are rich in soluble fiber (β-glucan), proven to help slow digestion and reduce post-meal glucose spikes.
2. Whole-Wheat Flour + Nuts Improve the Carb Profile
Whole-grain flours have a lower glycemic impact than refined flours, and nuts add healthy fats and protein—making the cookie more satiating.
3. Naturally Sweetened With Apple & Apple Butter
Using fruit reduces the need for excessive added sugars and contributes fiber plus polyphenols that may support metabolic health.
⚠️ Important caveats: because this recipe still includes sugars (light brown sugar, granulated sugar, apple butter, possibly dried fruit) and refined flour components (whole-wheat pastry flour), it must be eaten in moderation. Portion control is key. Even “better” cookies remain carbohydrate dense.
Ingredients:
- 1 cup old-fashioned oats
- ½ cup chopped pecans or walnuts
- 1 cup whole-wheat pastry flour
- ½ teaspoon baking soda
- ¼ teaspoon baking powder
- ¼ teaspoon salt
- ½ teaspoon ground cinnamon
- ⅛ teaspoon ground nutmeg
- 2 large egg whites
- ½ cup coarsely shredded peeled apple
- ½ cup packed light brown sugar
- ¼ cup apple butter
- 4 tablespoons granulated sugar
- 2 tablespoons canola oil
- ½ teaspoon vanilla extract
- ½ cup diced dried apples
Directions:
- Before starting preheat the oven to 375°F.
- Take a baking sheet transfer the nuts and oats into it, and bake it for about 5 to 8 minutes until it becomes smelly and brown. Set aside.
- Apply the cooking spray to the baking sheets.
- Now combine flour, baking powder, baking soda, nutmeg, salt, and ¼ teaspoon of cinnamon in a basin.
- Also, take a large bowl and mix the egg whites, shredded apple, oil, brown sugar, vanilla, apple butter, and 3 tablespoons of granulated sugar.
- Take the dry ingredients add them to the wet ones and stir them until they become moistened.
- Stir in the dried apples, nuts, and remaining oats.
- Using the tablespoon, drop the dough onto the prepared baking sheet and space them roughly 2 inches apart.
- In a separate bowl mix the remaining 1 tablespoon of granulated sugar and ¼ teaspoon of cinnamon.
- Soak the glass bottom in cinnamon sugar and use it to flatten the cookies.
- Bake them for about 10 to 12 minutes until they become lightly brown. Cool it for 2 minutes on the baking sheet and then transfer it to wire racks to finish the cooling.
3.7 Pineapple Nice Cream:
This Pineapple Nice Cream and smooth is made with exotic pineapple flavor. This recipe with crispy rice cereal with natural peanut butter or sunflower seed butter is a delicious treat for any occasion.
🔎 Nutrition & Clinical Considerations — What works and what to watch out for
- The core of this recipe is nut butter (peanut butter or similar) — nuts and nut butters are generally considered a good choice for people with diabetes when eaten in moderation. That’s because nuts provide healthy unsaturated fats, protein, fiber, and micronutrients (magnesium, antioxidants) while being relatively low in carbohydrates compared with many sweet snacks. Livestrong+2PubMed+2
- Research shows that including a moderate amount of tree nuts or peanut butter in the diet can improve insulin sensitivity, prevent post meal blood sugar spikes, and reduce cardiovascular risk — common concerns in diabetes. PubMed+2Harvard Health+2
- That said: because this treat also uses crispy rice cereal and chocolate, its total carbohydrate and sugar content may be significant, so portion control is essential. Treats like this should be considered occasional or small-portion snacks rather than regular indulgences.
- Always pair such snacks with a balanced meal or protein/fiber-rich food to slow glucose absorption and avoid rapid blood sugar spikes.
Conclusion (for a diabetic-friendly mindset): With careful portioning and pairing, a nut-butter–based treat like this can be used as an occasional snack — but it should not replace carbohydrate-balanced meals, and frequency should be limited.
Ingredients:
- ½ cup natural peanut butter, almond butter, or sunflower seed butter
- ¾ cup crispy rice cereal
- 1 teaspoon pure maple syrup
- ½ cup dark chocolate chips, melted
Directions:
- Use parchment or wax paper to cover the baking pan.
- Take a medium-sized bowl and mix the cereal, peanut butter, and maple syrup in it. Roll the mixture into 12 balls each with roughly 2 tablespoons per ball.
- Place these balls on the prepared baking sheet and freeze them for about 15 minutes until they become firm and hard.
- After solidifying, Coat the balls with chocolate and put them back for about 15 minutes in the freezer until the chocolate also solidifies.
3.8 Quinoa Dessert Pudding
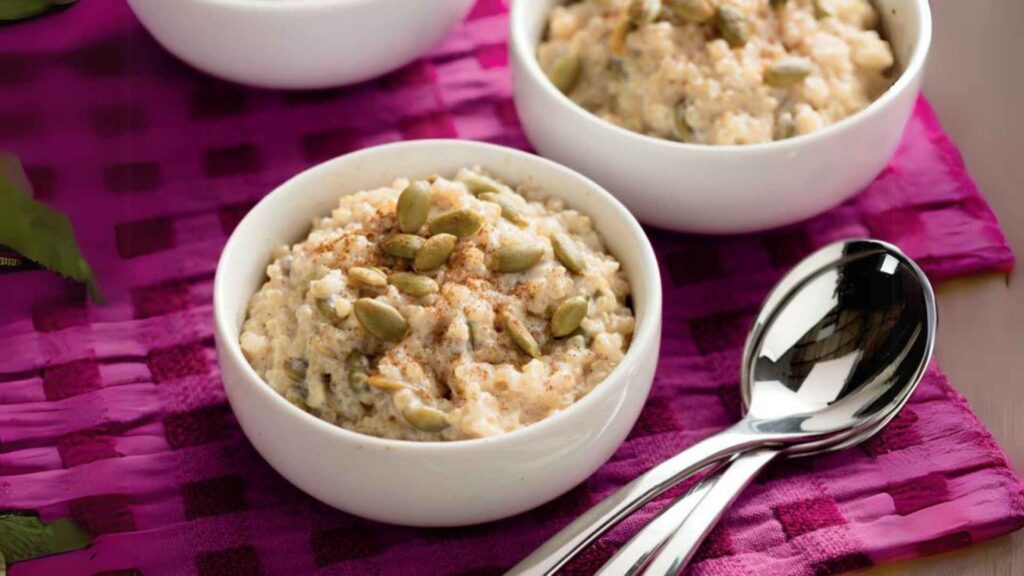
Approved by the American Diabetes Association this dessert is a healthy and tasty choice.
ngths, ideal for those aiming for balanced blood sugar control without giving up dessert entirely.
Why Quinoa Dessert Pudding Makes Sense for Balanced Eating
- Low-Glycemic & Slow-Release Carbs: Quinoa has a glycemic index around 53, which is considered low to moderate — meaning it raises blood sugar more gradually than refined grains. (Healthline)
- High Protein & Fiber Content: Compared to many grains, quinoa offers more protein and fiber, which slow digestion and help avoid sharp post-meal glucose spikes. (Healthshots)
- Complete Nutrient Package: Quinoa contains all essential amino acids and provides minerals like magnesium — nutrients linked to better insulin sensitivity and metabolic health.
- Gentle on Metabolism: Research suggests that long-term quinoa consumption can improve glycemic control and insulin sensitivity. In one controlled trial on people with impaired glucose tolerance, quinoa intake led to better post-meal glucose levels and lower HbA1c compared with a multigrain diet. (PubMed)
So when used carefully — moderate portion, controlled sweetening — a quinoa-based dessert pudding can be a wise occasional treat for people mindful of blood sugar.
Here are the ingredients and instructions for the Quinoa Dessert Pudding recipe.
Ingredients:
- 1 cup quinoa
- 1 1/2 cup skim milk
- 1 1/2 cup fat-free half-and-half
- 1/4 cup low-calorie brown sugar blend (such as Truvia or Splenda)
- 1 tsp vanilla extract
- 1/2 tsp ground cinnamon
- 1/4 tsp ground nutmeg
- 1/2 cup toasted pumpkin seeds
Directions:
Rinse the quinoa for 2 minutes in cold water.
Take a medium-sized saucepan over medium heat, and whisk together the ingredients i.e. milk, fat-free half-and-half, brown sugar blend, vanilla, cinnamon, and nutmeg. Heat it through a simmer.
When the milk mixture reaches a simmer, add the quinoa to it and lower the heat to a gentle simmer. Cook this partially covered and stir it every ten minutes for 40 minutes.
Before serving add the toasted pumpkin seeds to quinoa and enjoy.
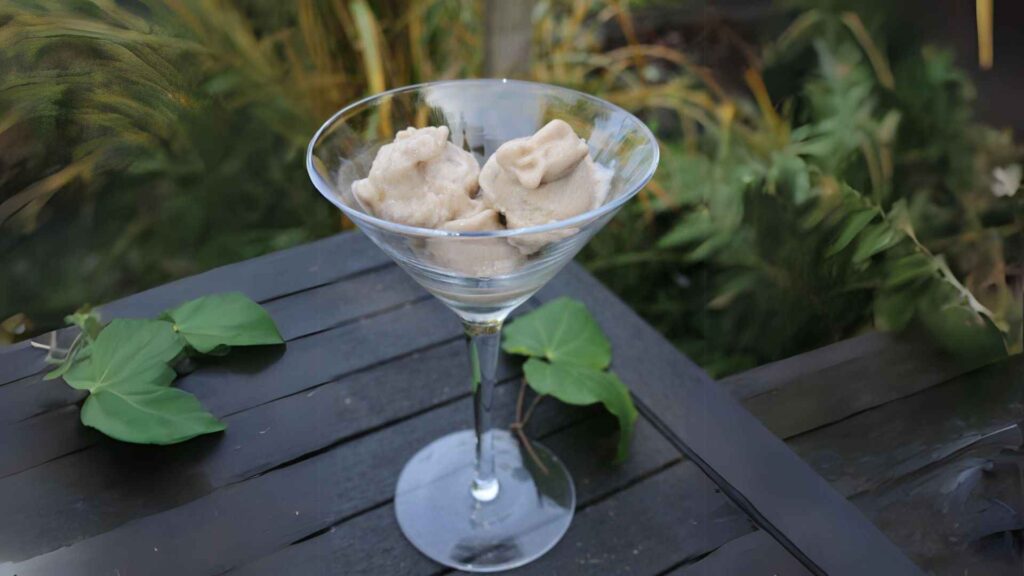
3.9 Strawberry Banana ‘Ice Cream’
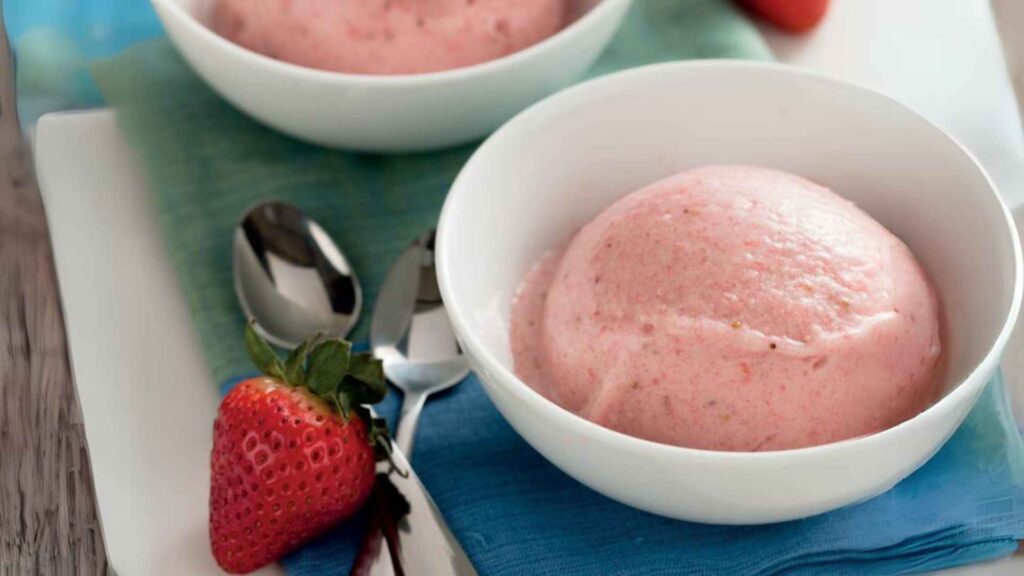
Strawberry Banana ‘Ice Cream’ is a frozen banana-based ice cream that is vegan, low in saturated fats, dairy-free, and sugar-free, ideal for those who carve for sweet strikes. Strawberries can also be used instead of bananas.
Why This Dessert Works (with Context for Blood-Sugar Management)
- Fruits with fiber = gentler glucose shifts. Both bananas and strawberries contain dietary fiber, which slows down digestion and moderates sugar absorption, helping avoid sharp spikes in blood glucose. (Healthline)
- Lower glycemic load compared with many desserts. Unlike cakes or ice creams made with refined sugars and heavy cream, this recipe relies on whole-fruit natural sugars and minimal added fat — making it a lighter, more balanced option.
- Vegan & dairy-free: lighter on digestion. Many traditional ice creams use heavy cream, which adds saturated fat and calories. Using coconut milk (or another plant-based milk) keeps the treat lighter and often easier to digest.
- Portion-friendly & easy to control. Because this treat is home-made and uses whole ingredients, you control the portion size — a key factor for blood sugar and calorie balance.
⚠️ Caution / Tip: Fruit sugars still affect blood glucose — especially depending on ripeness and portion size. For people monitoring glucose, it’s wise to serve modest portions (e.g. ½ cup) and note personal glycemic response.
Servings: 4
Serving Size: 1/2 cup
Nutrition Facts (per serving):
- Calories: 80
- Total Fat: 0 g
- Saturated Fat: 0.2 g
- Trans Fat: 0 g
- Cholesterol: 0 mg
- Sodium: 0 mg
- Total Carbohydrate: 19 g
- Dietary Fiber: 3 g
- Totl Sugars: 10 g
- Added Sugars: 0 g
- Protein: 0 g
- Potassium: 310 mg
- Phosphorus: 25 mg
- Choices/Exchanges: 1 Fruit
Ingredients:
- 2 bananas
- 1 cup sliced strawberries
- 2 tbsp coconut milk
Directions:
- Peel the bananas and cut them into ¼-inch round slices. Freeze it for at least 2 hours in a bowl.
- After freezing, mix them with coconut milk, strawberries, and a food processor or blender. Blend it for 30 seconds at a high speed. Clean the sides of the blender and blend again for 30 seconds at high speed. Continue this process until it becomes smooth and resembles ice cream.
- Freeze for thirty minutes to make an ice cream texture or it can be eaten right away after blending.
3.10 Apple Crisp
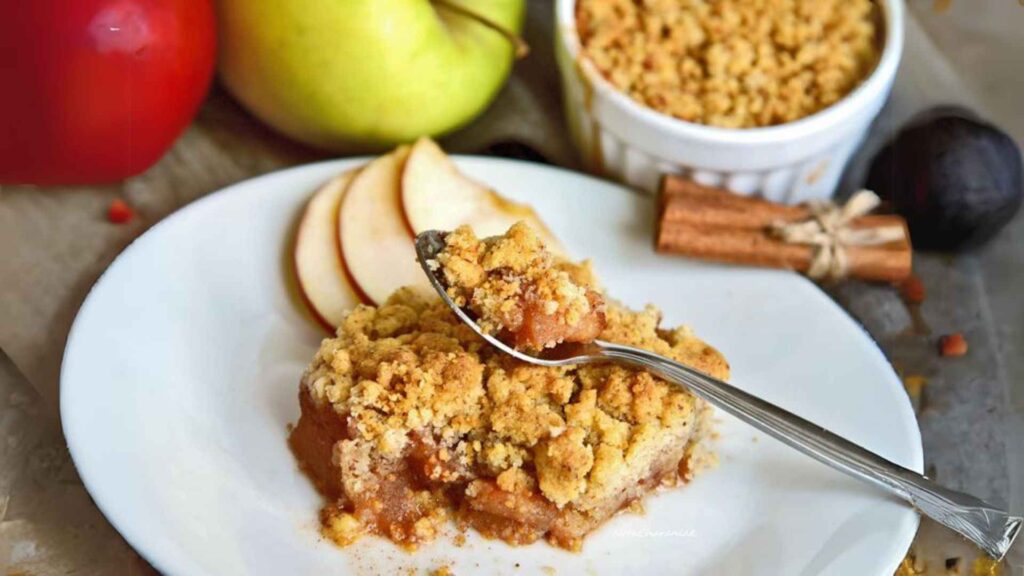
Why Apple Crisp Can Fit (If You Eat Mindfully)
- Apples are naturally rich in fiber, water, and antioxidants, which help slow digestion and moderate the rise in blood sugar after eating. (Healthline)
- The fiber (especially soluble fiber) helps delay carbohydrate absorption, reducing risk of sugar spikes. (CDC)
- If portion-controlled and eaten occasionally (not daily indulgence), Apple Crisp can satisfy a sweet craving while being better than many refined-sugar desserts.
⚠️ Because this recipe still includes added sugars (brown sugar) and refined flour, it should be treated as an occasional treat, not a regular dessert — especially for people watching blood glucose.
Prep time: 15 min
Servings: 7
Serving size: 1/2 cup
Nutrition Facts (per serving):
Calories: 130
Total Fat: 3 g
Saturated Fat: 0.6 g
Trans Fat: 0 g
Cholesterol: 0 mg
Sodium: 30 mg
Total Carbohydrate: 25 g
Dietary Fiber: 2 g
Total Sugars: 16 g
Added Sugars: 8 g
Protein: 1 g
Potassium: 110 mg
Phosphorus: 35 mg
Ingredients:
- Nonstick cooking spray
- 1/4 cup packed brown sugar
- 1/4 cup all-purpose flour
- 1/2 cup old-fashioned rolled oats (not quick cooking)
- 2 tbsp margarine (softened)
- 1 tsp ground cinnamon
- 1/2 tsp ground nutmeg
- 1 tsp vanilla extract
- 5 cups red apples (peeled, sliced, about 5 apples)
Directions:
- Take a 13 x 9-inch pan and put a cooking spray on it. Preheat the oven to 375°F.
- Take a small basin and mix the brown sugar, flour, oats, margarine, vanilla, nutmeg, and cinnamon in it. The mixture should be crumbly.
- Arrange the apples on the pan and equally distribute the brown sugar mixture over it.
- Bake it for 30 minutes.
3.11 Sugar-free Dessert Recipe! just 3 ingredients! no gelatin! no cornstarch! no eggs!
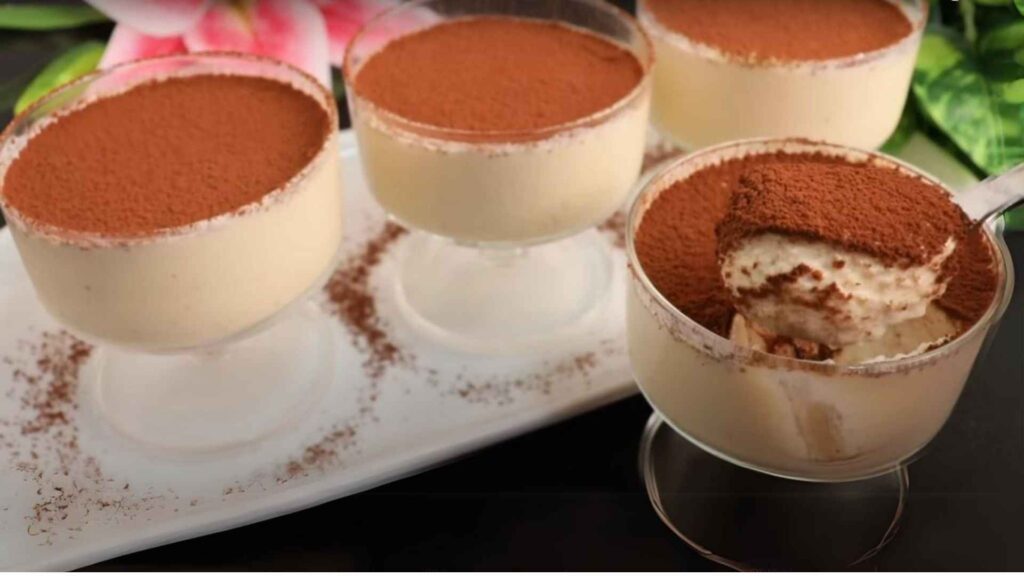
Figs are naturally rich in soluble fiber, helping slow glucose absorption and improve digestion — a win for blood-sugar control. Dates are optional because they significantly raise sugar content.
This nutritious recipe is perfect for diabetics which creates a silky and delicious fig custard.
Ingredients:
- 250g dried figs (about 20-23 figs)
- 4 cups milk (1 liter)
- 3 tablespoons milk powder (25g)
- 4-5 dates (optional)
- Chopped nuts or fruits (for garnish)
- Cocoa powder (optional, for garnish)
Instructions:
- Wash and Soak the Figs: Soak the dried figs in a dish with boiling water for about 10 to 15 minutes to make them clean.
- Heat the Milk: In a separate pot heat the milk to boiling and skim off any cream that rises to the surface.
- Prepare the Figs: Drain the fig from water after 15 minutes and chop it into small pieces.
- Mix Milk and Figs: In a large bowl transfer the chopped fig and add 1 cup of boiling milk to it. Mix well until it becomes a paste.
- Cool the Remaining Milk to warm: Allow the remaining milk to cool down a little bit. The milk should be warm, not scorching, use your finger to check the warmth. If you have an injured hand or finger, do not use it.
- The remaining amount Ingredients: Whisk one tablespoon into the cooled milk and mix it well. After that, stir it in fig paste.
- Optional Sweetness: For more sweetness add more fig and stir it but it is not recommended for diabetics.
- Ferment: Cover the bowl and place it in a warm place like a turned-off oven and let it for 6 hours to ferment.
- Serve and Enjoy: After fermentation, the custard should be thick and smooth. Serve it cooled or at room temperature. You can add chopped fruits, nuts, or (optionally) a sprinkling of cocoa powder as garnish.
Tips:
- Dried figs and dates naturally sweeten this recipe so you can add or reduce the number of figs and dates according to your sweetness level.
- To prevent curdling make sure that the milk cools slightly before adding to the fig mixture.
- Feel free to try different other nuts and fruits as garnish.
3.12 Vegan Raw Chocolate Cheesecake Recipe
Vegan Raw Chocolate Cheesecake Recipe is a vegan recipe for diabetics to fill their sweet carving.
The recipe used agave nectar in the video which shoud be avoided due to too high in fructose which is bad for diabetics according to Journal of the American Medical Association — fructose and NAFLD risk, ADA Nutrition Consensus Report — added sugars and diabetes risk, and Harvard School of Public Health — agave = worse for metabolism than glucose
So remove blue agave nectar because too high in fructose which is bad for diabetics.
Add 6–8 pitted Medjool dates OR 3 tbsp erythritol/stevia blend that Lower glycemic impact.
Add 2 tbsp chia seeds (optional) for Boosts fiber + helps thickening.
Ingredients:
- 2 cups raw cashews (soak overnight or 1 hr in boiling water)
- ¾ cup raw cocoa powder
- ½ cup warm water
- ½ cup raw coconut oil (liquid)
- 2 teaspoons vanilla extract
- Sweetener option: • 6–8 dates OR 3 tbsp stevia/erythritol blend
- Optional: 2 tbsp chia seeds
Instructions:
- Blend soaked cashews + water until smooth.
- Add cocoa powder, vanilla, coconut oil + sweetener.
- Blend until mousse-like.
- Spread in a freezer-safe dish. Freeze 45–60 min.
- Optional frosting:
2 tbsp cocoa + 2 tbsp coconut oil + stevia → whisk glossy. - Chill 20 min more before slicing.
Portion: 1–2 small squares max.
3.13 Low-Carb Strawberry Cake with Vanilla Buttercream (Diabetic-Friendly)

This diabetic-friendly low-carb recipe has layers of fresh strawberries and fuzzy vanilla buttercream on top of juicy cake. This recipe is best when made a day before serving and is best for summer.
Yields: 12 servings
Prep Time: 15 minutes
Cook Time: 35 minutes
Total Time: 50 minutes (plus cooling time)
Ingredients:
Cake:
- 4 egg whites
- ½ cup (100 g) granulated erythritol
- 1 cup (113 g) almond flour
- 3.5 oz (100 g) butter, melted
- ⅔ cup (160 ml) heavy whipping cream
- 2 tsp baking powder
- 2 tsp ground psyllium husk powder
- 4 drops almond extract
Vanilla Buttercream:
- 4 egg yolks
- ¾ cup (180 ml) heavy whipping cream
- 2 tbsp (25 g) erythritol
- 3.5 oz (100 g) butter, softened
- ½ tsp vanilla extract
Frosting and Decoration:
- 1 ¼ cups (300 ml) heavy whipping cream
- 1 lb (454 g) fresh strawberries
Instructions:
- Prepare the pan and preheat the oven: Preheat the oven up to 365°F (185°C) and butter an 8-inch springform cake pan.
- Separate the Eggs content and Whip the Whites: Separate the egg whites and yolk and put the whites in a large bowl while the yolk is in a small saucepan. Using an electric mixer, whip the whites for about 3 minutes or until soft peaks form.
- Sweeten and Blend Cake Batter: After that, add erythritol to the beaten egg whites in a large bowl, and then add almond flour, baking powder, psyllium husk powder, almond essence, and melted butter. Do not overwhip the mixture by adding everything.
- Bake the Cake: Evenly pour the butter into the springform pan that has been oiled. After 35 minutes of baking in the preheated oven, a toothpick placed in the center of the cake comes out.
- Allow the Cake to Cool Fully: After taking it out from the oven allow it to cool fully and wrap it in plastic and chill it overnight in the freezer for better texture and flavor when serving the next day.
- Making the Vanilla Buttercream: In a saucepan over low heat, combine the egg yolks and heavy whipping cream. Then add the remaining ingredients (egg yolks, heavy whipping cream, erythritol, vanilla extract except the butter and whisk everything well. Mix it continuously until it becomes thick. Steer clear of boiling the cream—it will curdle. Take off the heat.
- Add Butter and Chill: Chop the softened butter into small pieces and add it to the cream mixture bit by bit mixing all the ingredients until it melts and thoroughly mixed. If possible refrigerate it the whole night and let it cool completely.
- Whip the Buttercream: After frosting scoop the cooled buttercream into a big bowl and mix it with an electric mixer until it becomes light and fluffy.
- Assemble the Cake: Cut the cake into two equal layers vertically and position the bottom layer onto a cake stand, cover half of it with vanilla buttercream. Then carefully put the second layer on top and cover the entire cake with the leftover buttercream.
- Whip the Frosting and Decorate: Whip the remaining heavy cream until firm peak form, then beat in the frosting and decorate. To prepare the desired design, spread the whipped cream icing over the entire cake using a spatula or piping bag.
- Decorate with Strawberries: Finally, decorate the cake with fresh sliced or wedged strawberries. You can also try and add edible flowers for an added summery touch.
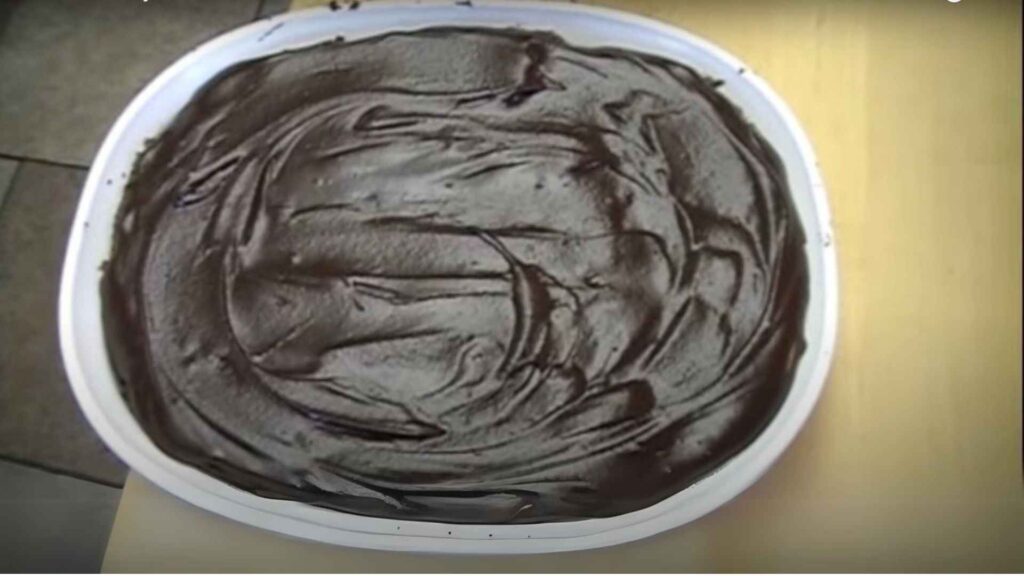
3.14 Simply the Best Low-Carb Chocolate Avocado Mousse
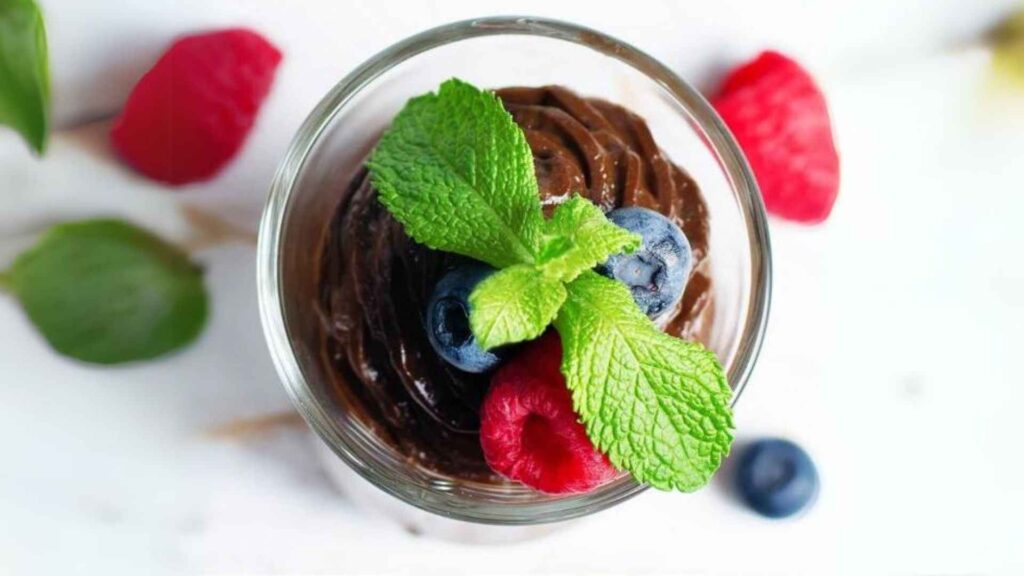
This mousse is a low-carb, diabetic-friendly recipe that requires only 4 ingredients and 5 minutes to prepare.
Ingredients:
- 1 ripe avocado, peeled and pitted
- ¼ cup unsweetened cocoa powder (or cacao powder for a more intense flavor and added nutrients)
- 2 tablespoons maple syrup (or 1 teaspoon monk fruit sweetener for a lower-carb option)
- 1 teaspoon vanilla extract
Instructions:
- Combine all the ingredients in a blender.
- Blend it until it becomes smooth and creamy.
- To achieve the desired level of sweetness, add one teaspoon of cacao powder at a time and taste it regularly.
- Take a serving bowl and transfer mousse to it.
- Before serving refrigerate it for at least half an hour.
Tips:
- This recipe serves one at a time so to get the desired serving numbers, multiply the ingredients accordingly.
- You can top the mousse with chopped nuts, fresh berries, or a dollop of nut butter for added taste and texture.
- If any leftovers occur, you can store them in the refrigerator for up to 3-4 days.
You can also use this recipe to make chocolate icing for low-carb muffins or cupcakes. Add ¼ cup of unsweetened almond milk while blending for a thicker consistency that works well for icing.
3.15 Keto Cheesecake Bars with Blueberries
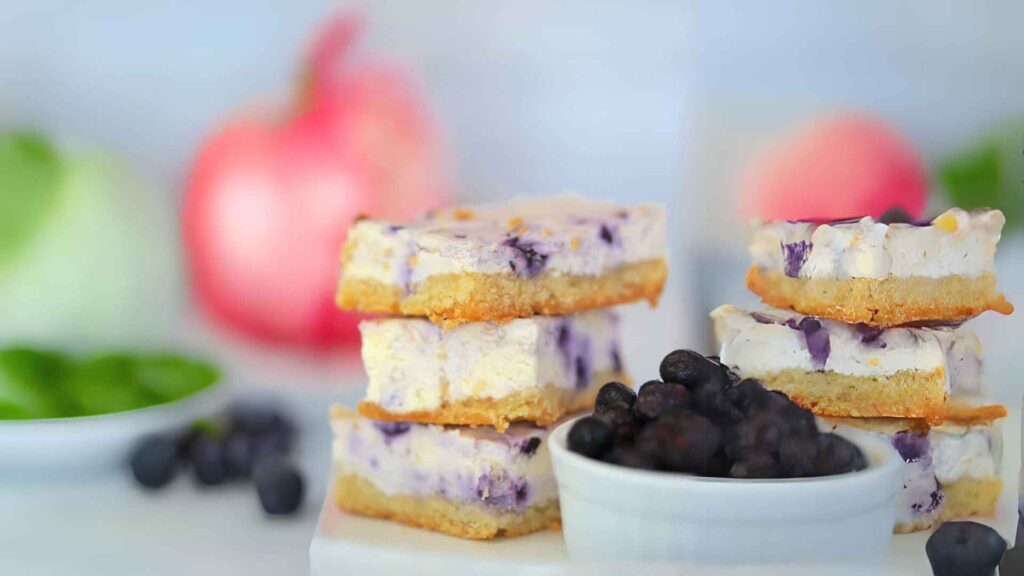
Keto Cheesecake Bars with Blueberries is a sugar-free almond flour-encrusted cheesecake bar whose interior is filled with blueberries. This is ideal for diabetics and a ketogenic diet.
Yields: 16 bars
Prep Time: 10 minutes
Cook Time: 40 minutes
Total Time: 50 minutes
Ingredients:
Crust:
- ½ cup unsalted butter, melted
- 1.5 cups almond flour
- 1 tablespoon granular sweetener (erythritol recommended)
Filling:
- 16 oz softened cream cheese
- 1 large egg
- 1 teaspoon vanilla extract
- ¼ cup powdered sweetener (erythritol recommended)
- ½ cup frozen blueberries
Instructions
- Preheat the oven to 350°F (175°C) and set aside an 8×8-inch baking sheet lined with baking paper.
- Using an electric mixer, mix the melted butter, granular sweetener, and almond flour in a bowl. Then firmly and uniformly press the mixture into the baking pan prepared with parchment paper.
- For ten minutes bake the crust at 350°F (175°C). The edges should be golden brown after 10 minutes.
- In a separate dish, mix and beat the egg, vanilla extract, powdered sweetener, and softened cream cheese together using an electric mixer until it becomes smooth and creamy.
- Using a spatula, carefully fold the frozen blueberries into the cheesecake filling. Don’t overmix the blueberries as it may break it.
- Now evenly spread the cheesecake filling over the pan’s cooked crust and bake it for 30 minutes at 350°F/175°C.
- Let it cool before taking it out from the pan. When it cools completely then remove it from the pan using the parchment paper and refrigerate it overnight before serving.
Conclusion/Summary:
To wrap it up, the “15 Diabetic Dessert Recipes Without Artificial Sweeteners” offers a comprehensive range of dessert choices for those who are taking care of their diabetes. The recipes explained provide tasty substitutes for sugar that prioritize health and emphasize natural diabetic-friendly ingredients.
From fruity pies to creamy mousse, every recipe offers a fulfilling and delicious choice for individuals with dietary limitations. Through this comprehensive guide, nutritional data, and helpful tips provide the reader with confidence to enjoy the taste with sugar under control.
All things considered, this collection from authentic sources highlights the creativity and adaptability found in sweets suitable for people with diabetes, proving that richness may still be savored sensuously.
FAQs-15 Diabetic Dessert Recipes Without Artificial Sweeteners
Why are these dessert recipes right for diabetics?
These recipes are specifically for diabetics being low in carbs and free from artificial sweeteners.
Are these recipes easy to make?
Yes, each recipe is provided with complete details, from ingredients to directions and serving sizes that make it accessible for all levels of cooks.
Are these desserts suitable for other dietary restrictions, such as gluten-free or vegan diets?
Some recipes may be suitable for other dietary restrictions, but it’s essential to review each recipe to determine if it aligns with specific dietary needs.
Can I modify these recipes to suit my taste preferences?
Absolutely! These recipes provide flexibility and anyone can adjust the quantity and ingredients according to their preferences or dietary requirements.
How can I store these desserts?
The recommended time with extended storage time for recipes is provided keeping the freshness and quality intact.
What are some natural sweeteners suitable for diabetics?
Erythritol and monk fruit sweeteners are natural sweeteners that have very little impact on blood sugar levels than traditional sugar.
Are these recipes suitable for special occasions or gatherings?
Certainly! With these desserts, one can enjoy both everyday and special occasions, parties, or gatherings with friends and family.
Source
https://www.diabetes.org.uk/guide-to-diabetes/recipes/summer-berry-crush
https://www.eatingwell.com/gallery/7933746/diabetes-friendly-desserts-to-make-forever
https://www.diabetesfoodhub.org/search-results.html?keywords=dessert
https://www.dietdoctor.com/recipes/low-carb-strawberry-cake-with-vanilla-buttercream
https://onedrop.today/blogs/blog/low-carb-chocolate-avocado-mousse-recipe-for-diabetes